空间向量数据#
GeoPandas 简介#
GeoPandas 的目标是使 python 中的空间数据更容易使用。它结合了 pandas 和 shapely 的功能,提供了 pandas 中的空间运算和多个几何图形的高级接口。GeoPandas 使您能够轻松地用 python 执行运算,否则将需要诸如 PostGIS 这样的空间数据库。
数据结构#
GeoPandas 实现了两个主要的数据结构,GeoSeries 和 GeoDataFrame。它们分别是 pandas Series 和 DataFrame 的子类。
GeoSeries#
GeoSeries 本质上是向量,其中向量中的每个条目都是一组对应于观察结果的形状。一个条目可能只包含一个形状(如单个多边形)或多个被认为是一个观察结果的形状(如组成夏威夷州或印度尼西亚等国家的多个多边形)。
Geopandas 有三种基本的几何对象(实际上是 shapely 的对象):
Points / Multi-Points
Lines / Multi-Lines
Polygons / Multi-Polygons
from matplotlib import pyplot as plt
import geopandas as gpd

plt.style.use('bmh') # 更适合绘制几何图形。
from shapely.geometry import Point
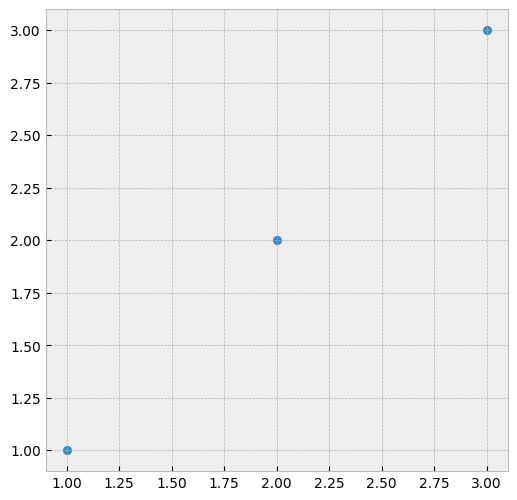
s = gpd.GeoSeries([Point(1, 1), Point(2, 2), Point(3, 3)])
s
0    POINT (1.00000 1.00000)
1    POINT (2.00000 2.00000)
2    POINT (3.00000 3.00000)
dtype: geometry
fig, ax = plt.subplots(figsize=(12, 6))
s.plot(ax=ax);
from shapely.geometry import LineString
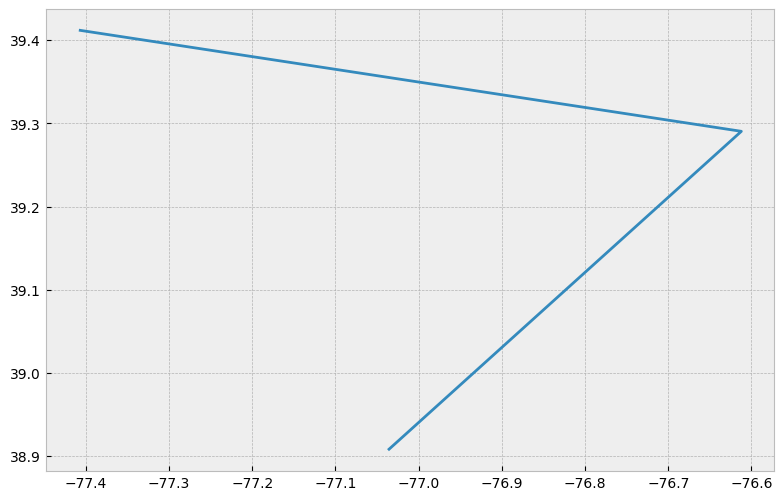
l= gpd.GeoSeries([LineString([Point(-77.036873,38.907192),
                              Point(-76.612190,39.290386,),
                              Point(-77.408456,39.412006)])])
l
0    LINESTRING (-77.03687 38.90719, -76.61219 39.2...
dtype: geometry
fig, ax = plt.subplots(figsize=(12, 6))
l.plot(ax=ax);
from shapely.geometry import Polygon
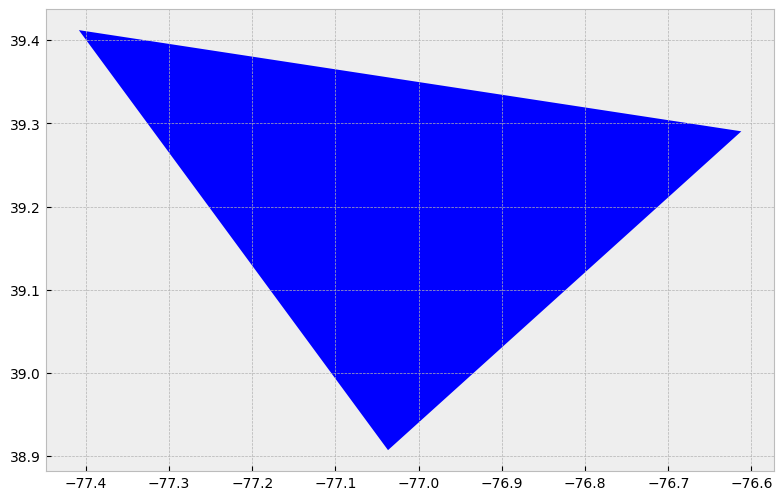
p= gpd.GeoSeries([Polygon([Point(-77.036873,38.907192),
                           Point(-76.612190,39.290386),
                           Point(-77.408456,39.412006)])])
p
0    POLYGON ((-77.03687 38.90719, -76.61219 39.290...
dtype: geometry
fig, ax = plt.subplots(figsize=(12, 6))
p.plot(ax=ax);
注意,GeoSeries 中的所有条目不需要具有相同的几何类型,但如果不是这样,某些导出操作将失败。
GeoDataFrame#
GeoDataFrame 是包含 GeoSeries 的表格式数据结构。
GeoDataFrame 最重要的属性是它总是有一个 GeoSeries 列,它持有一个特殊的状态。这个 GeoSeries 被称为 GeoDataFrame 的“几何”。当将空间方法应用到 GeoDataFrame (或调用类似 area 的空间属性)时,此命令将始终作用于“几何”列。
“几何”列——不管它的名字是什么——都可以通过几何属性(gdf.geometry)访问,并且可以通过键入 gdf.geometry.name 找到几何列的名称。
备注
GeoDataFrame 还可以包含具有几何(形状)对象的其他列,但一次只能有一列是活动几何。要更改哪个列是活动几何列,请使用 GeoDataFrame.set_geometry() 方法。
使用世界 GeoDataFrame 的例子:
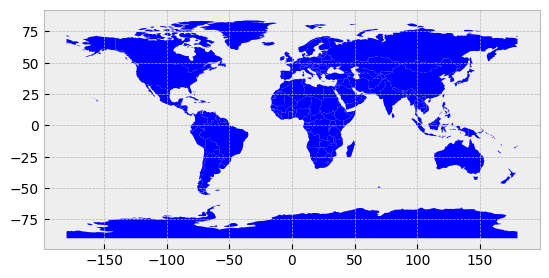
world = gpd.read_file(gpd.datasets.get_path('naturalearth_lowres'))
world.head()
/tmp/ipykernel_5992/913829029.py:1: FutureWarning: The geopandas.dataset module is deprecated and will be removed in GeoPandas 1.0. You can get the original 'naturalearth_lowres' data from https://www.naturalearthdata.com/downloads/110m-cultural-vectors/.
  world = gpd.read_file(gpd.datasets.get_path('naturalearth_lowres'))
| pop_est | continent | name | iso_a3 | gdp_md_est | geometry | |
|---|---|---|---|---|---|---|
| 0 | 889953.0 | Oceania | Fiji | FJI | 5496 | MULTIPOLYGON (((180.00000 -16.06713, 180.00000... |
| 1 | 58005463.0 | Africa | Tanzania | TZA | 63177 | POLYGON ((33.90371 -0.95000, 34.07262 -1.05982... |
| 2 | 603253.0 | Africa | W. Sahara | ESH | 907 | POLYGON ((-8.66559 27.65643, -8.66512 27.58948... |
| 3 | 37589262.0 | North America | Canada | CAN | 1736425 | MULTIPOLYGON (((-122.84000 49.00000, -122.9742... |
| 4 | 328239523.0 | North America | United States of America | USA | 21433226 | MULTIPOLYGON (((-122.84000 49.00000, -120.0000... |
world.plot();
空间点线多边形#
经常发现处于这样一种情况:需要从头生成新的空间数据,或者需要更好地理解数据是如何构造的。这节课将带您了解一些最常见的数据生成形式。
import pandas as pd
import geopandas as gpd
from shapely.geometry import Point, LineString, Polygon
# import fiona
import matplotlib.pyplot as plt
plt.style.use('bmh') # 更适合绘制几何图形。
创建 GeoDataFrame 几何#
GeoDataFrame 对象是 pandas.DataFrame,具有几何列的数据帧。空的 GeoDataFrame 就是空的,本质上就像 pandas 的那个一样。
创建空的 GeoDataFrame,并创建名为 geometry 的新列,它将包含 Shapely 对象:
# 创建空白的 geopandas GeoDataFrame
newdata = gpd.GeoDataFrame()
print(newdata)
Empty GeoDataFrame
Columns: []
Index: []
为了有工作的空间数据框架,需要定义一些东西:
GeoDataFrame 组件#
data:包含所需属性数据的pandas.DataFrame、字典或空列表[]。如果没有数据,则使用[]。crs:几何对象的坐标参考系(Coordinate Reference System)。可以是pyproj.CRS.from_user_input()所接受的任何内容,例如权限字符串(例如 “EPSG:4326”)或 WKT 字符串。geometry:DataFrame 中的列名称,用作几何或 Shapely 点、线或多边形对象。
因为 geopandas 利用了 Shapely 的几何对象,所以可以通过将 Shapely 的几何对象传递到 GeoDataFrame 来从头创建 Shapefile。这是非常有用的,因为它可以很容易地将包含坐标的文本文件转换为 Shapefile。
现在在 GeoDataFrame 中有一个几何列,但是还没有任何数据。
从坐标列表中创建点#
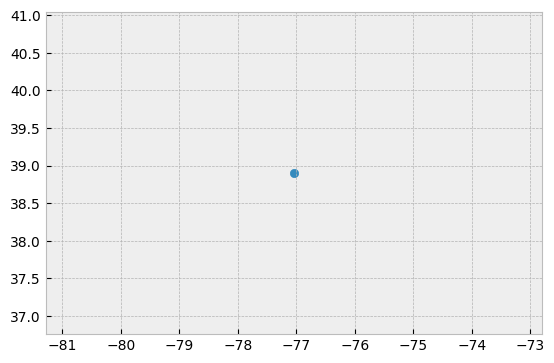
创建 geopandas 点对象是一个快照!所需要的是坐标对,从中生成 Shapely 点几何对象,然后创建字典,保存该几何和想要的任何属性,以及坐标参考系统。
# GW department of geography 的十进制坐标
coordinate = [-77.04639494419096,  38.89934963421794]

# 从坐标对中创建 Shapely
point_coord = Point(coordinate)

# 创建具有所需属性和所需几何列的数据帧
df = {'GWU': ['Dept Geography'], 'geometry': [point_coord]}

# 将 shapely 对象转换为  geodataframe
point = gpd.GeoDataFrame(df, geometry='geometry', crs ="EPSG:4326")

# 渲染
point.plot();
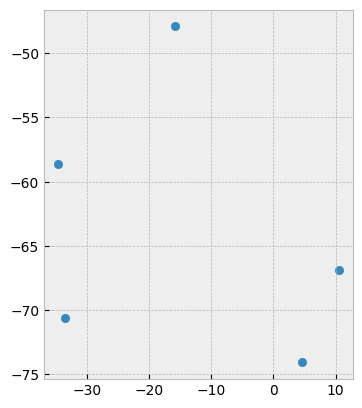
可以对存储在 pandas 数据框架中的点集应用相同的过程。
# 属性和坐标列表
df = pd.DataFrame(
    {'City': ['Buenos Aires', 'Brasilia', 'Santiago', 'Bogota', 'Caracas'],
     'Country': ['Argentina', 'Brazil', 'Chile', 'Colombia', 'Venezuela'],
     'lat': [-34.58, -15.78, -33.45, 4.60, 10.48],
     'lon': [-58.66, -47.91, -70.66, -74.08, -66.86]})

# 从坐标元组列表中创建 Shapely points
ply_coord = [Point(x, y) for x, y in zip(df.lat, df.lon)]

# 用 crs 转换 shapely 对象到 geodataframe
poly = gpd.GeoDataFrame(df, geometry=ply_coord, crs ="EPSG:4326")
poly.plot();
从经纬度(lat, lon) CSV 创建点#
最常见的数据创建任务之一是从点列表或 .csv 文件创建 shapefile。幸运的是,将这些数据转换成可用的格式非常容易。
首先,必须创建示例 .csv 数据集来工作:
import pandas as pd
# 创建 Washington DC 的轮廓,并写入 csv
path_to_csv = 'points.csv'
points = {'Corner':['N','E','S','W'],
          'lon': [-77.0412826538086, -77.11681365966797, -77.01896667480469, -77.0412826538086],
          'lat': [38.99570671505043, 38.936713143230044, 38.807610542357594, 38.99570671505043]}
points = pd.DataFrame.from_dict(points)
points.to_csv(path_to_csv)
要从我们的数据创建 geodataframe,您只需要将其读入,并使用 points_from_xy 将其指向 df 的正确列,即 df 指定几何列值 df.lon 和 df.lat。
# 读取点数据
df = pd.read_csv(path_to_csv)

# 从使用 'EPSG' 代码的数据创建 geodataframe,以分配 WGS84 坐标系
points= gpd.GeoDataFrame(df, geometry=gpd.points_from_xy(x=df.lon, y=df.lat), crs = 'EPSG:4326')
points
| Unnamed: 0 | Corner | lon | lat | geometry | |
|---|---|---|---|---|---|
| 0 | 0 | N | -77.041283 | 38.995707 | POINT (-77.04128 38.99571) |
| 1 | 1 | E | -77.116814 | 38.936713 | POINT (-77.11681 38.93671) |
| 2 | 2 | S | -77.018967 | 38.807611 | POINT (-77.01897 38.80761) |
| 3 | 3 | W | -77.041283 | 38.995707 | POINT (-77.04128 38.99571) |
在本例中,points_from_xy() 用于将 lat 和 lon 转换为 shapely.Point 对象列表。这将被用作 GeoDataFrame 的几何图形。(points_from_xy() 只是 [Point(x, y) for x, y in zip(df.lon, df.lat)] 的增强包装器。
小技巧
虽然我们说 “lat lon”,但 python 使用 “lon lat” 代替,这遵循了使用 x, y 作为符号的偏好。
通常,像上面的数据一样,这些数据存储在 WGS84 经纬度中,但一定要检查这一点,另一种常见的格式是 UTM 坐标(寻找从东到西约 \(500\,000\) 的值,以米为单位)。
创建空间线条#
按照上面的例子,可以很容易地指定线条。在这种情况下,假设有追踪三个骑自行车穿过城镇的人的线。跟踪他们的唯一 id ID,他们的位置 X, Y 和他们的速度,并读取以下数据:
from io import StringIO
data = """
ID,X,Y,Speed
1,  -87.789,  41.976,  16
1,  -87.482,  41.677,  17
2,  -87.739,  41.876,  16
2,  -87.681,  41.798,  16
2,  -87.599,  41.708,  16
3,  -87.599,  41.908,  17
3,  -87.598,  41.708,  17
3,  -87.643,  41.675,  17
"""
# 使用 StringIO 读取文本块
df = pd.read_table(StringIO(data), sep=',')
让我们把这些转换成点来看看。注意,在本例中点不能很好地替代线,我们有三个个体,它们需要分别处理。
# zip 坐标到点对象,并转换为 GeoDataFrame
points = [Point(xy) for xy in zip(df.X, df.Y)]
geo_df = gpd.GeoDataFrame(df, geometry=points, crs = 'EPSG:4326')
geo_df.plot();
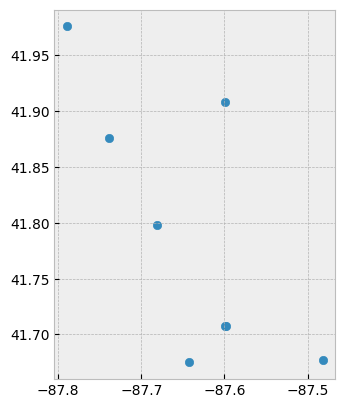
现在让将这些数据作为线处理,可以利用列 ID 到 .groupby。幸运的是,geopanda .groupby 与 pandas 的用法一致。所以这里 .groupby(['ID']),对于每个 ID 组,将值转换为一个列表,并将其存储在 Fiona LineString 对象中。
# 把每个点的 `ID` 组看作一条线
lines = geo_df.groupby(['ID'])['geometry'].apply(lambda x:  LineString(x.tolist()))

# 存储为 GeodataFrame 并添加 'ID' 作为列(当前存储为 'index')
lines = gpd.GeoDataFrame(lines, geometry='geometry', crs="EPSG:4326")
lines.reset_index(inplace=True)
lines.plot(column='ID');
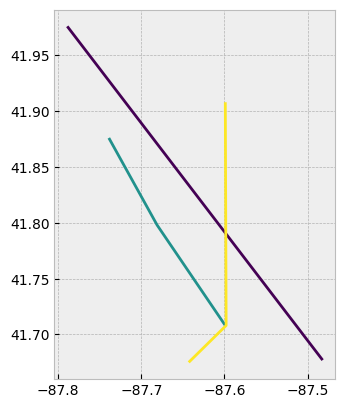
现可以看到,每条线都是由 ID 单独处理的,并使用 .plot(column='ID') 绘制它们。
创建空间多边形#
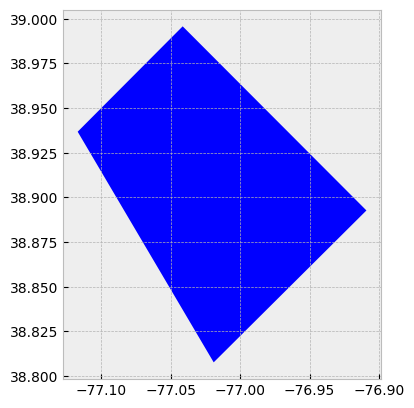
在 geopandas 中创建多边形与其他练习非常相似。首先,从坐标中创建 Fiona 几何对象,将其添加到具有任何属性的数据帧中,然后使用指定的坐标参考系统(coordinate reference system,简称 CRS)创建 GeoDataFrame。
# list of coordindate pairs
coordinates = [[ -77.0412826538086, 38.99570671505043 ], [ -77.11681365966797, 38.936713143230044 ], [ -77.01896667480469, 38.807610542357594],
               [-76.90910339355469,  38.892636142310295]]

# Create a Shapely polygon from the coordinate-tuple list
ply_coord = Polygon(coordinates)

# create a dictionary with needed attributes and required geometry column
df = {'Attribute': ['name1'], 'geometry': ply_coord}

# Convert shapely object to a geodataframe
poly = gpd.GeoDataFrame(df, geometry='geometry', crs ="EPSG:4326")

# Let's see what we have
poly.plot();
创建空间点(必须承认这是漫长的过程)#
因为 geopandas 利用了 Shapely 的几何对象,所以可以通过将 Shapely 的几何对象传递到 GeoDataFrame 来从头创建 Shapefile。这是非常有用的,因为它可以很容易地将包含坐标的文本文件转换为 Shapefile。
让我们创建空的 GeoDataFrame,并创建名为 geometr 的新列,它将包含我们的 Shapely 对象:
# Create an empty geopandas GeoDataFrame
newdata = gpd.GeoDataFrame()
# Create a new column called 'geometry' to the GeoDataFrame
newdata['geometry'] = None

print(newdata)
Empty GeoDataFrame
Columns: [geometry]
Index: []
/tmp/ipykernel_5992/2510346371.py:4: FutureWarning: You are adding a column named 'geometry' to a GeoDataFrame constructed without an active geometry column. Currently, this automatically sets the active geometry column to 'geometry' but in the future that will no longer happen. Instead, either provide geometry to the GeoDataFrame constructor (GeoDataFrame(... geometry=GeoSeries()) or use `set_geometry('geometry')` to explicitly set the active geometry column.
  newdata['geometry'] = None
创建表示 GWU 地理学系的 Shapely Point,可以将它插入到 GeoDataFrame 中:
# Coordinates of the GW department of geography in Decimal Degrees
coordinates = (-77.04639494419096,  38.89934963421794)

# Create a Shapely polygon from the coordinate-tuple list
point = Point(coordinates)

# Let's see what we have
point
现在有了合适的 Polygon -object。
将多边形插入到 GeoDataFrame 的“geometry”列中:
# Insert the polygon into 'geometry' -column at index 0
newdata.loc[0, 'geometry'] = point

# Let's see what we have now
newdata
| geometry | |
|---|---|
| 0 | POINT (-77.04639 38.89935) |
现在有了带 Point 的 GeoDataFrame,可以将它导出到 Shapefile中。在 GeoDataFrame 中添加另一列,名为 Location,文本为 GWU Geography。
# Add a new column and insert data
newdata.loc[0, 'Location'] = 'GWU Geography'

# Let's check the data
newdata
| geometry | Location | |
|---|---|---|
| 0 | POINT (-77.04639 38.89935) | GWU Geography |
好了,现在有了额外的有用的信息能够识别特征代表什么。
在导出数据之前,确定 GeoDataFrame 的坐标参考系统(CRS,“投影”)是很有用的。
GeoDataFrame 有叫做 .crs 的属性,它显示了在例子中为空(None)的数据坐标系统,因为是从头创建数据(例如 newdata.crs 返回 None)。
为 GeoDataFrame 添加 crs。Python 模块 fiona 有很好的 from_epsg() 函数,用于传递 GeoDataFrame 的坐标系统。接下来,将使用它,并确定投影到 WGS84 (epsg code:4326),这是最常见的选择,lat lon CRSs:
# Import specific function 'from_epsg' from fiona module
from fiona.crs import from_epsg

# Set the GeoDataFrame's coordinate system to WGS84
newdata.crs = from_epsg(code = 4326)

# Let's see how the crs definition looks like
newdata.crs
---------------------------------------------------------------------------
TypeError                                 Traceback (most recent call last)
Cell In[24], line 5
      2 from fiona.crs import from_epsg
      4 # Set the GeoDataFrame's coordinate system to WGS84
----> 5 newdata.crs = from_epsg(code = 4326)
      7 # Let's see how the crs definition looks like
      8 newdata.crs

File fiona/crs.pyx:1252, in fiona.crs.from_epsg()

TypeError: from_epsg() takes exactly 1 positional argument (0 given)
最后,可以使用 GeoDataFrames.to_file() 导出数据。该函数的工作原理与 numpy 或 pandas 类似,但这里只需要为 Shapefile 提供输出路径。
# Determine the output path for the Shapefile
outfp = r"../temp/gwu_geog.shp"

# Write the data into that Shapefile
newdata.to_file(outfp)
